As bloggers or affiliate marketers, we often forget the importance of Internal Linking. Internal linking was one of the most important factors in the beginning, and it has since become another crucial factor today.
Whether you are a new website owner or have a well-established blog, making internal links can be confusing and time-consuming.
My goal is to share a new type of link-building strategy that can alleviate a great deal of pressure from your shoulders while you focus on other aspects of the website.
I will share my take on Internal Link Juicer Pro and why you should get that.
You can read Link Whisper Review: Top Internal Linking WordPress Plugin

What is Internal Link Juicer?
Internal Link Juicer is a WordPress plugin that automatically helps you create internal links within your website. It takes the keyword suggestion you set, looks in other posts for the keywords, and builds links.
I like this tool because it only goes after the exact match term & I set it for each post. I have used many other linking tools, which are decent, but while searching for similar terms, they start making links from the same keyword in bulk.
If you have read the new Algorithm update on Google Search Central, you might know Google will penalize spammy websites.
One of the major issues that Google marks any website as spammy is only for keyword stuffing bad practices and keyword manipulation.
So if you build too many links on exact keywords or similar keywords forcefully, Google might take that as spam. But Internal Link Juicer only takes the keyword you suggest, which controls how many links a post can get from a keyword.
How Internal Link Juicer Works?
The process is pretty straightforward. Install and set up the plugin. Then go to your post, and you will find the Internal Link Juicer widget on the rights side of your post dashboard. Type the targeted keywords you want your links from and hit “Add Keyword.”
Keyword Gap
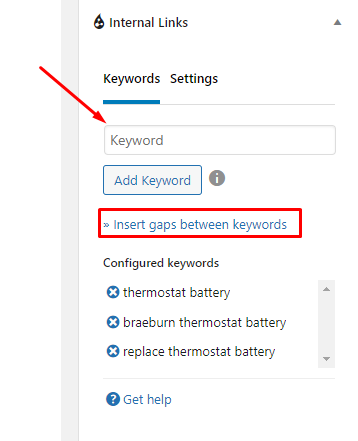
One of the features I like, You will see an “Insert Keyword Gap” button just under “Add Keyword.” Here you will be able to set 3 parameters.
- Minimum: The minimum number of words between two of your targeted keywords. For example, I want a minimum of 3 words between “Affiliate” and “Beginners” to count that phrase as a keyword. Whenever the plugin finds any matching term to my choice, it will make a new link.
- Exact: the exact numbers of words need to be there to count as a keyword.
- Maximum: This is the one I like most because making links on keywords of more than 5 words is not a good practice. So setting a gap of 3 words between your target keyword will trigger the indexer to build a link when it finds a matching term.
One important thing is always clicking “update” after adding a keyword if you enable manual index. If you miss that, your database won’t update, and the link juicer will not add that in the auto linker. Wait for the plugin to crawl and build links on different posts.
Installing Internal Link Juicer Pro
Like any other free plugin, you can use its lite version which is available on the WP repo. Just search for the plugin, install and activate.
If you want to avoid the free version, just download the Pro version then install it manually. Add the license key and activate it. Finally, you are done.
Internal Link Juicer Interactive Tour
After activation, Internal Link Juicer will give you an interactive tour of the basics. You will be able to see short YouTube videos that show live examples of the features.
This is an awesome feature for those who need an explanation video for understanding any feature.
The videos are okay, but those were not enough to understand it all for beginners. It took me my own experience with the plugin to get the best out of it. And my goal is to explain it to you as easily as possible, so you don’t need to do a Google or YouTube search.
Internal Link Juicer Features
To access the plugin, you will have to find it on the left side of your WordPress dashboard panel. It usually sits just below the “Media” tab.
On landing, you will be on the dashboard page. You will find 3 links there, including: “Docs & How to,” “Interactive Tour,” and “Request Support.”
In all these, I will say the “Request Support” page is actually worth checking because the “how-to” might look confusing.
The support page lands on a forum page where you will be able to see problems people have faced already and ask for your query as well.
Dashboard
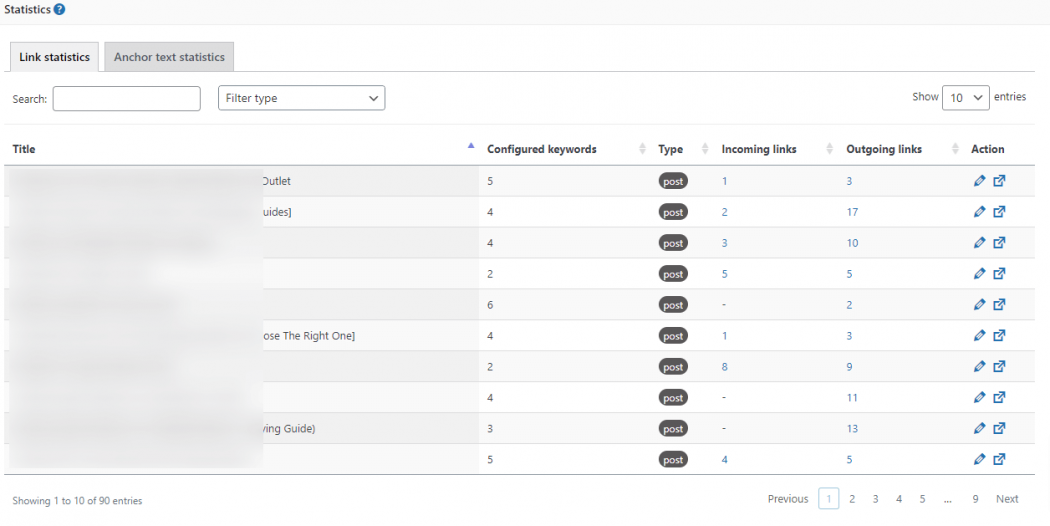
In the dashboard, you will be able to see Link Statistics and Anchor Text Statistics.
Link Statistics Option Internal Link Juicer
Link Statistics shows how many incoming and outgoing links have been on a particular post. You can click on the numbers to check which posts have been linked from or linked to that post. You can view and edit the post from this dashboard as well.
Anchor Text Statistics
Anchor Text Statistics is pretty simple. It will show you the number of keywords used to build backlinks and the frequency. The frequency shows how many times and from which posts that specific keyword was used to make an internal link.
Custom Links
For me, I think this one is a great feature. If you have multiple niche sites on a similar topic/product, you can use this feature more often.
Also, if you are selling products from Amazon with affiliate links, this feature will be an excellent option.
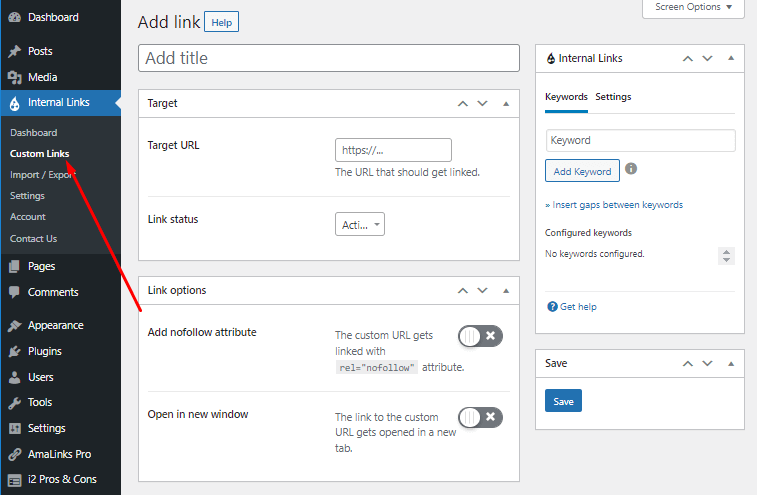
I will show you a real example. As you can see in the screenshot above, I am an affiliate marketer. Now I might be talking about affiliate links in some of my posts. I want to add a link on that every time I mention it, but that could be a lot of hassle.
But with this feature, that will be done automatically. You can go more creative with this feature to build outbound links. Don’t forget to add multiple keywords and a No-follow anchor tag with open with new tab script.
Import/Export Links
If you have a website with over 200 posts/pages, that might take you days to go to each post and set keywords. This will feel like an overload instead of an asset. But the import/export setting will make this easy for you.
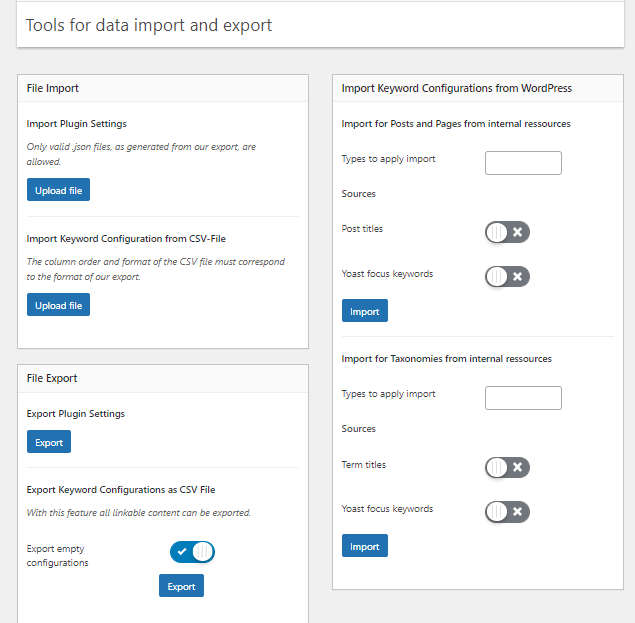
To start with basics, you can add the post titles and taxonomies like Tag, Category as keywords. You just need to select Post, Page, Taxonomies, enable post title or term titles, and hit import. It will import the titles and tags as keywords for posts.
However, the CSV file format will be more effective. Click on the export button, and you will get a list of your post in a CSV file along with keywords cells.
Add the keywords according to your post type and reupload that same file using the import option. And all of your keywords will be updated. If that is not a time saver, I don’t know what is.
Settings
You will get 3 more sub-tabs to help you configure the plugins on this tab. You will be able to change:
- General
- Content
- Link Settings
General
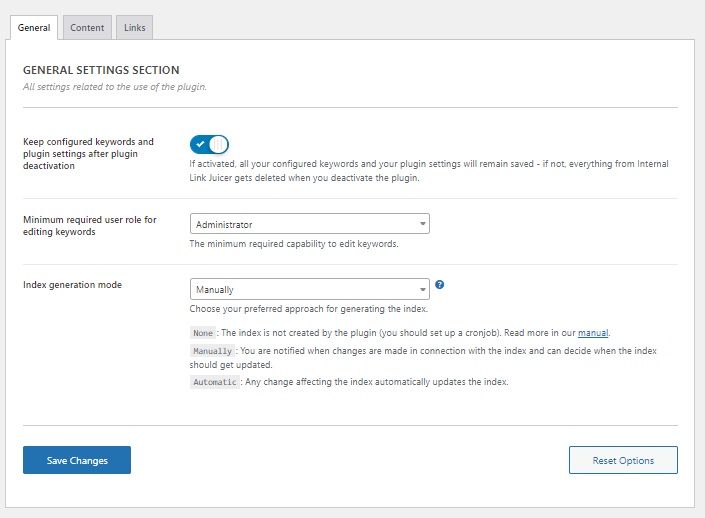
I will suggest you keep “Keep Configured Keywords” enabled. If you need to uninstall the plugin for any issue like debugging your website, you might lose all of your links.
So, if you want to keep your links even though you want to remove the plugin, just this setting is a must.
Content
The content setting page gives you more flexibility in how you want your pages to be linked. You can specify the pages, posts, and taxonomies to add to your whitelist. Also, you can blacklist specific pages or post from here as well.
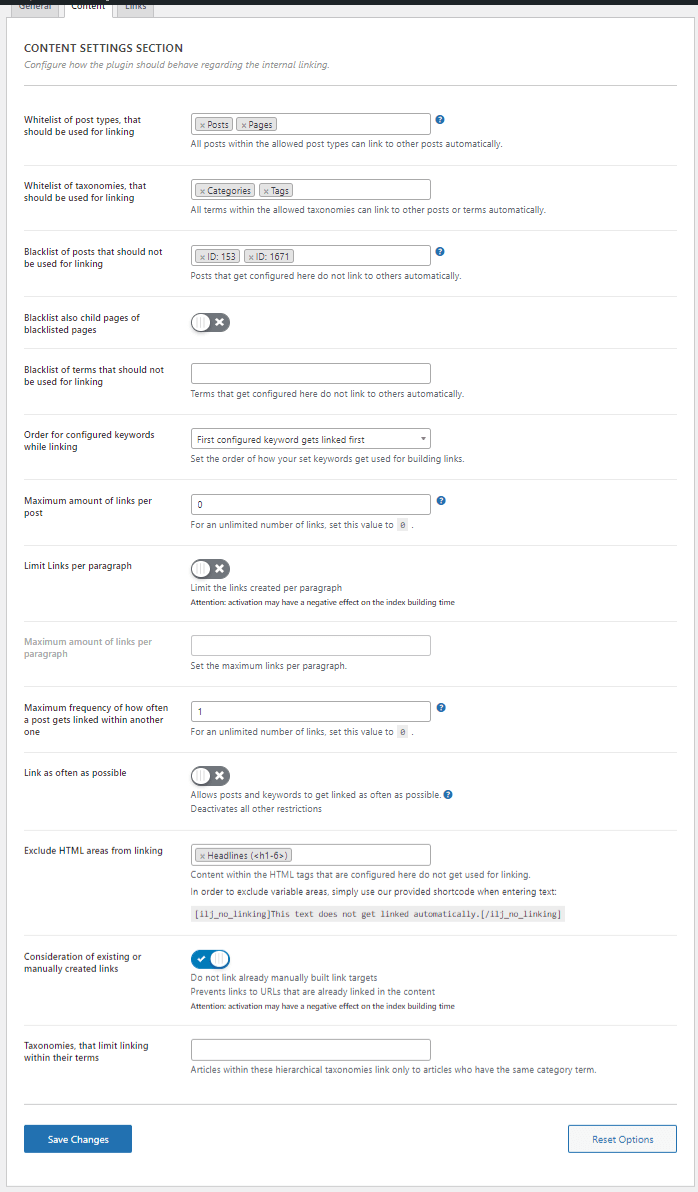
For example, I would obviously avoid making any link from my contact us page. And even from the terms & conditions page as well. So adding that from the dropdown will help the plugin avoid any links from those pages.
The keyword configuration is and non-major but important setting. You can set it in 5 different conditions.
For example, you can set it “First added keyword gets the most priority” or “Lowest Character keyword gets most priority.” Usually, I keep it default because I can reassign everything from the post page.
You can set the maximum number of outbound, internal links from each page and the maximum number of links from one page to another.
Usually, keeping the maximum number of posts from any page to “0” will allow creating unlimited links. I prefer to keep it like that.
However, you should keep a maximum of 1 link per post when linking from one page to another. Because the link value will be equal for both 1 and 100 links making too many links for the same page from a specific page is a bad SEO practice.
The plugin comes with auto-avoiding H1 to H6 tags for making links. But you can add many other parameters like avoiding Bold Text or ‘Quotes’ from the Exclude HTML settings.
You may or may not enable the “Consideration of existing or manually created links,” but I think you should not avoid it just for the sake of link indexing delay.
If you are sure, the links you made manually are good, keep that on. If you don’t do that, Internal Link Juicer can change those links to something else if it suits the configuration.
Link
You can edit your link in both HTML and JS. Unless you know what you are doing, just leave that as is. And adding a Nofollow tag in the internal link is not a smart choice because the link juice won’t flow that way.

Account
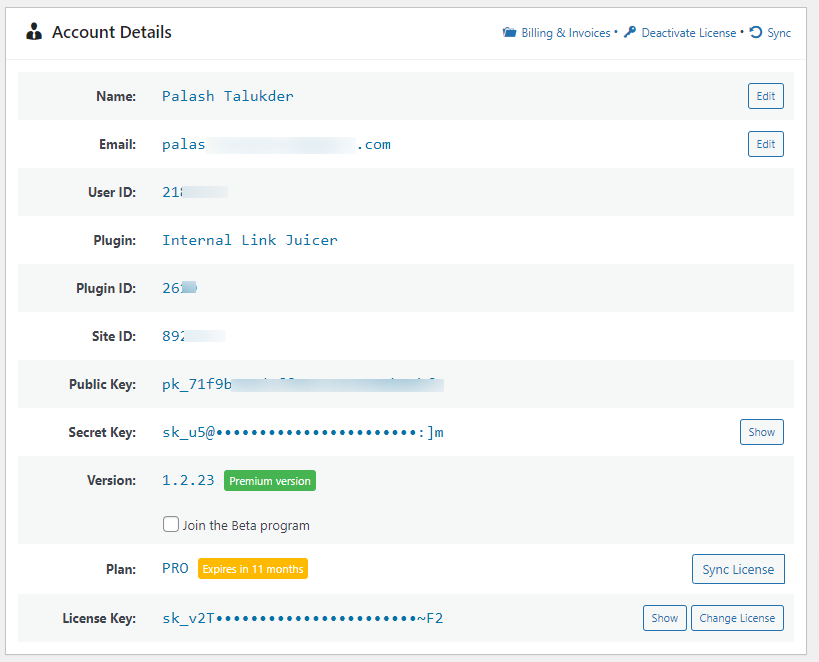
Here you can see, change and sync your license key after renewing your plans.
Contact Us
The pro version of the plugin is distributed by Freemius but you will get support from the original plugin author.
So if you have any technical or billing issues or bug reports, just send your message from here. This will be enough. They will contact you on your email with further notices.
Internal Link Juicer Pro Price
The pro plugin comes with 2 different price ranges where you can use it on different numbers of sites.
- 1 site yearly subscription is $69.99 or $249.99 for a lifetime deal.
They also offer a money-back guarantee.
If you don’t like the plugin and request for refund within 14 of purchase, you will get a 100% refund. But there are some conditions you can check their official website for more details on the refund.
Buy Internal Link Juicer with 15% OFF! Code: WPBASICPRO
People Also Ask (FAQs)
Will the plugin mess up my content?
Absolutely not. It doesn’t write or remove anything from the content. It scans your pages for keywords and automatically adds links without disturbing anything.
Will Internal Link Juicer improve ranking?
In the world of SEO, nothing is guaranteed. Internal linking is one of the 200 major factors of the Google algorithm.
So, you cannot rely on this single tool to improve rankings. But as people are getting results from internal links and Silo structures, giving it a try is not a bad option.
Final Verdict
I will not neglect the importance of internal links in the future because SEO is changing. But as my website grows, making internal links will get tough.
I guess you may want to scale up your website and online business fast but effectively. A tool like the Internal Link Juicer can make your life way easy than going to each post and adding links from there.
There is a refund policy, so getting this tool even for trial is not bad. However, as you will be able to use the lite version from the WP repo, I don’t think that you will resist the pro plan once you use it.
